How to Add New Students to a Section?
Before you begin, your school or parish account must be set to username. To check, go into an existing section and if you do not see an “Add Student” button then you need to call Customer Care at 1-800-533-8095 to switch to username.
Note: You cannot add existing students to a section. Existing students must enroll.
Step 1: Log in into your account and select the course you would like to add students to.
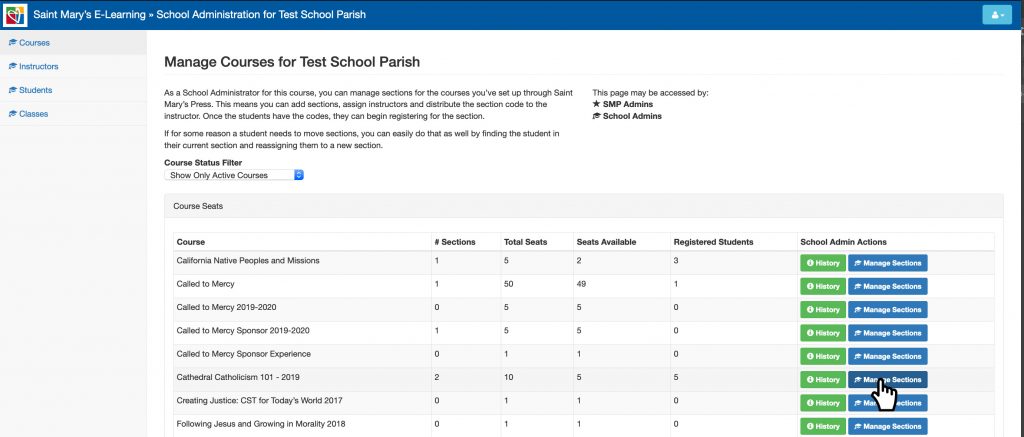
Then select the section you would like to add students to. If you don’t have a section set up, or are not sure how to do this, see “How to Setup a Section” in the School Admin FAQs.
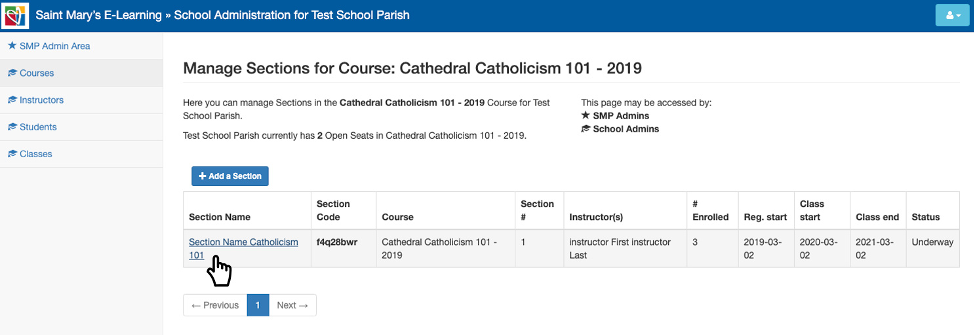
The section page will open up.
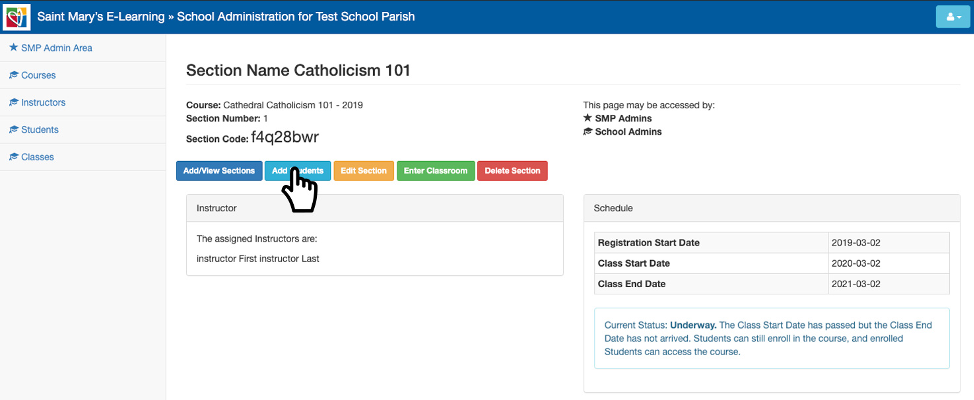
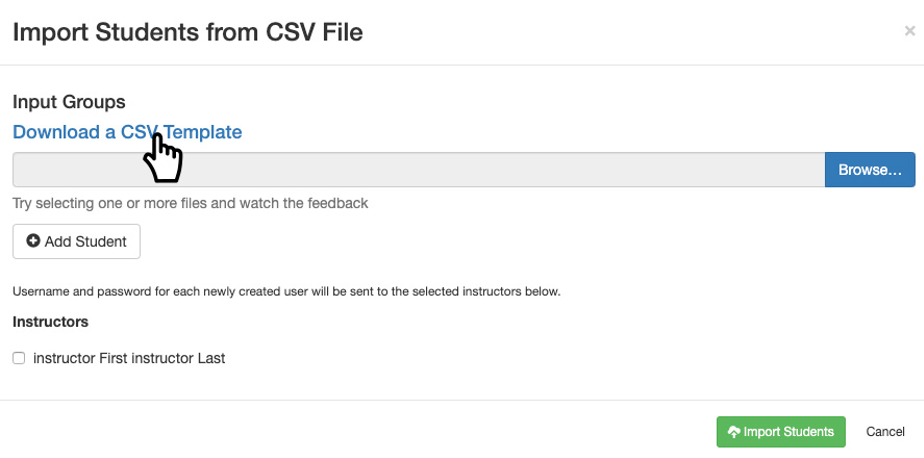
Step 2: Select the “Add Students” button and the “Import Student Menu” pop-up will appear.
Step 3: Select the “Add New Students” tab.
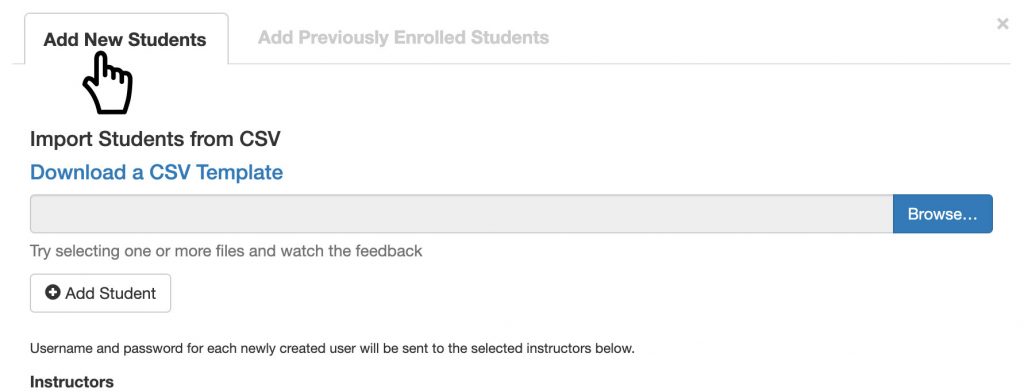
Step 4: Select “Download a CSV Template” to download a CSV, open in Excel, and input students’ information.
You can also, enter the students individually, by selecting the “Add Students” button, but for a large student list, CSV would be better.
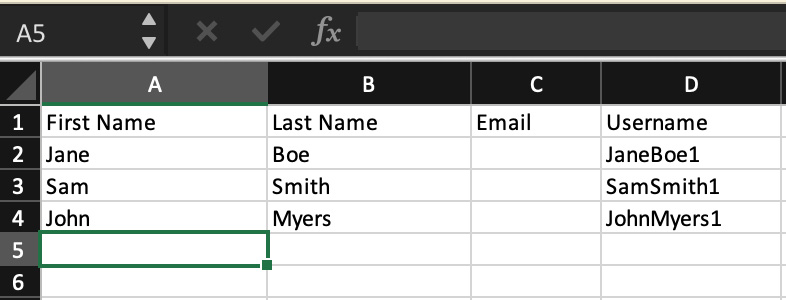
Step 5: In the CSV, enter the first and last name, then the username.
Clear the email address fields, you will not need to enter one.
The username should be entered first name, last name and number 1. For example, JaneBoe1. Or you can leave the username blank and have the system generate one.
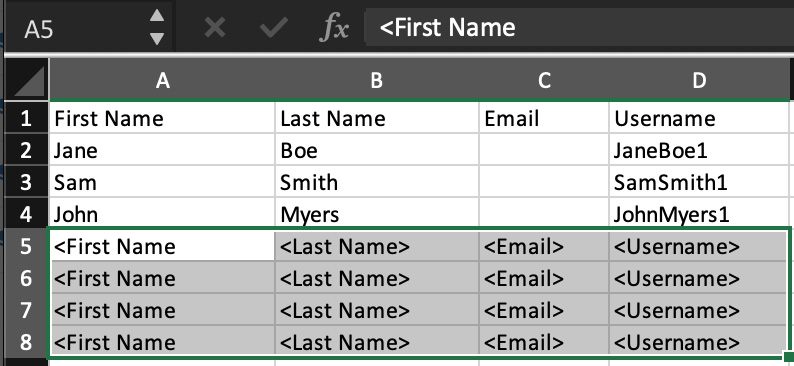
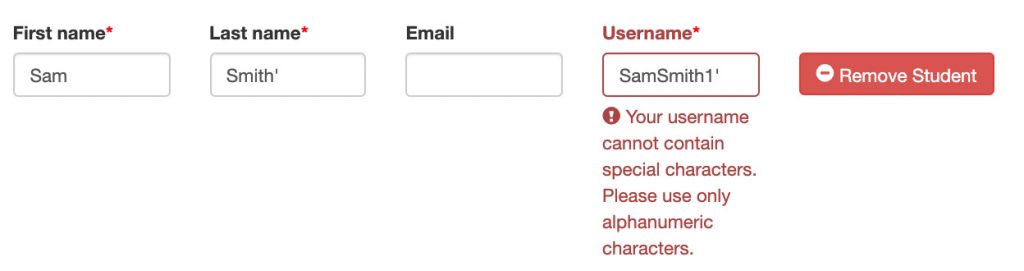
Note: Do not use any special characters in the username, they will not be allowed. Also, do not use special characters in the first or last name because the password is generated by first name, last name and special characters have unique font styles for every devices and the student will not be able to log in.
Clear out any remaining field before you upload by using “Delete” and not the space bar.
Step 6: Once you have completed inputting the student’s info, save the CSV and then go back to the “Import Student” menu pop-up and select “Browse“. You will be able to navigate through your files, select the saved CSV file, and click “Open.“
Your imported student’s information should be automatically populated. If you need to edit or remove the fields, you can do so.
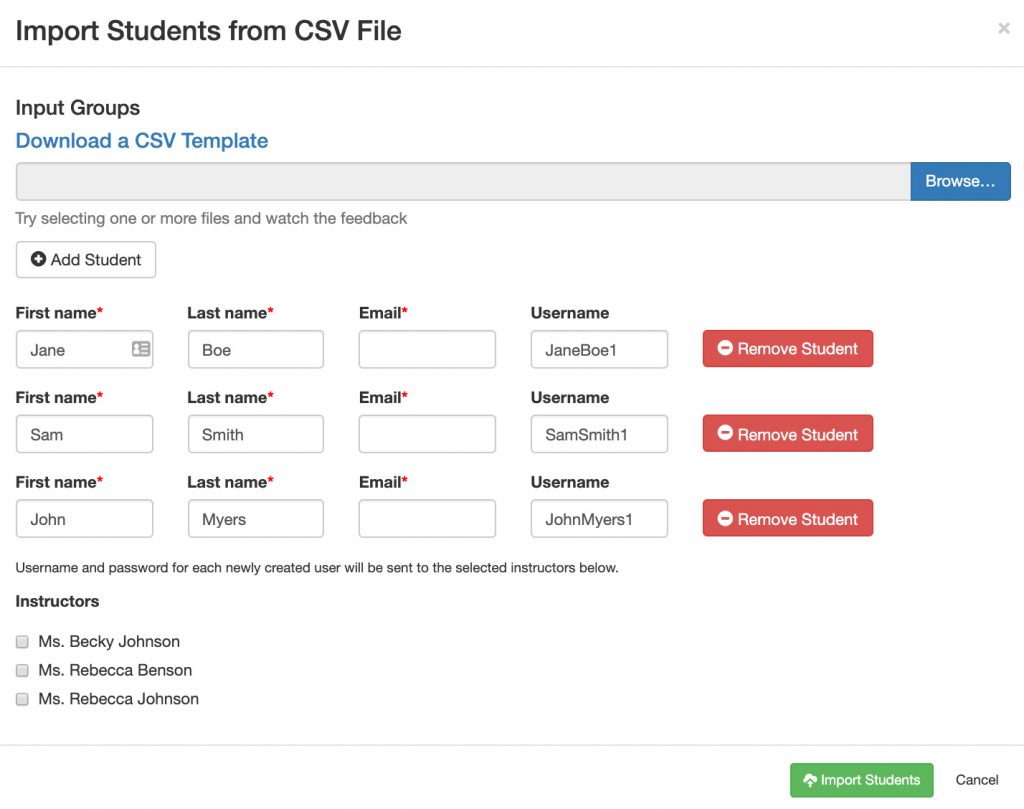
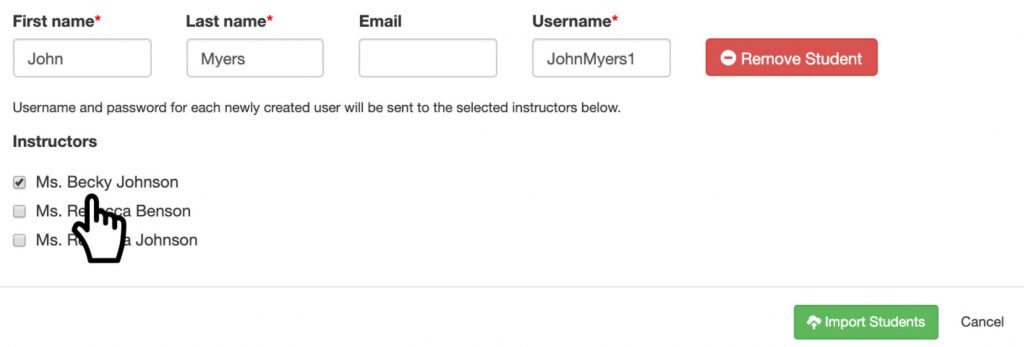
Step 7: Select the instructor(s) for the section, so the students’ generated passwords will be sent to them.
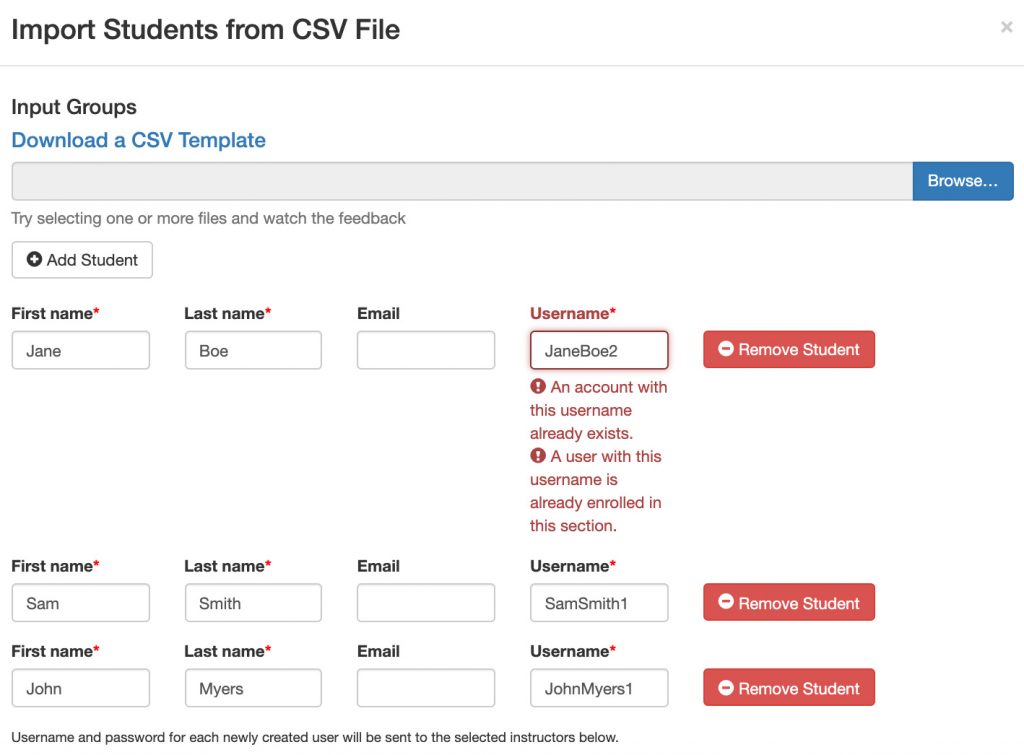
Note: If you get a username error, stating the username already exists, try using a different number instead of 1. Example, JaneBoe2 or JaneBoe3, and so on.
If you get an error message that an email address already exists, check to see if the student already has an account. If the student does have an account, then they will have to enroll into the section to keep the same user account and courses under the same email address.
If you get the error message “Email address is needed or already exist,” and you are a username based school or parish call Customer Care at 800-533-8095.
Step 8: After you selected “Import Student,” you should get a success message at the top of the pop-up. Close out of the “Add Student” pop-up and refresh your page. The students should be listed at the bottom under “Enrollment.”

Note: You can only add student(s) if they do not have an existing account. If you are using a username or email address each time you upload a student to a section they will get a new username and password.