How to Use the Admin Platform?
Course Side Entry Page
Step 1: Log into the site and you will be on the entry page. From this page, you can click on “settings” and update your name, email and password. Also, you will see all active course sections that you are assigned as an instructor.
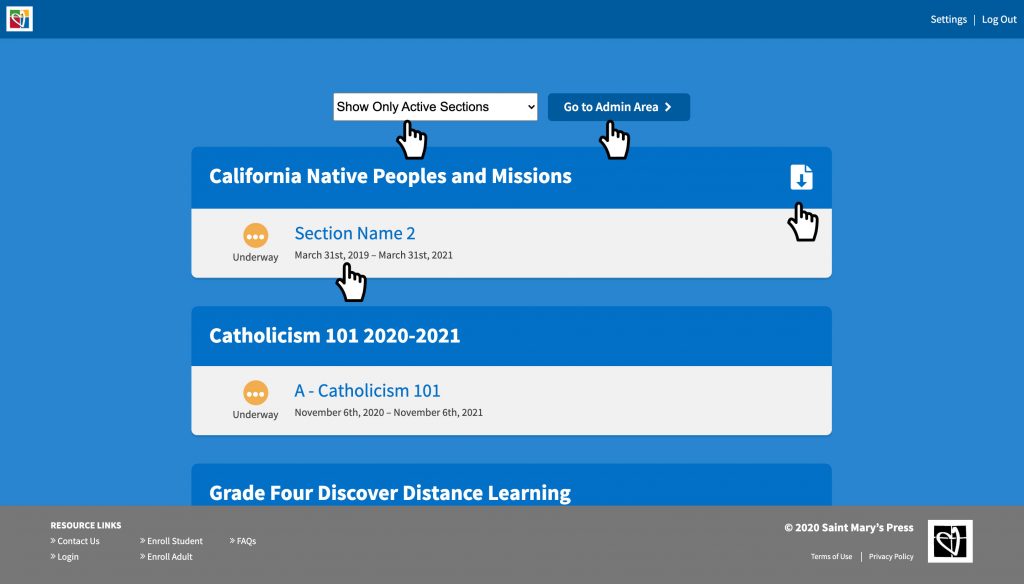
Step 2: You can click on the “course filter” to see all, concluded, or active course sections.

Step 3: The icon to the left of the section name will show the status of the section, underway is yellow dots, pending (registering) is an hour glass and concluded is a green checkmark. To enter a section click on the “section’s name“.
Step 4: To download documents for the course, click on the “paper icon” with the down arrow. If the course does not have the paper icon then there are no documents to download.
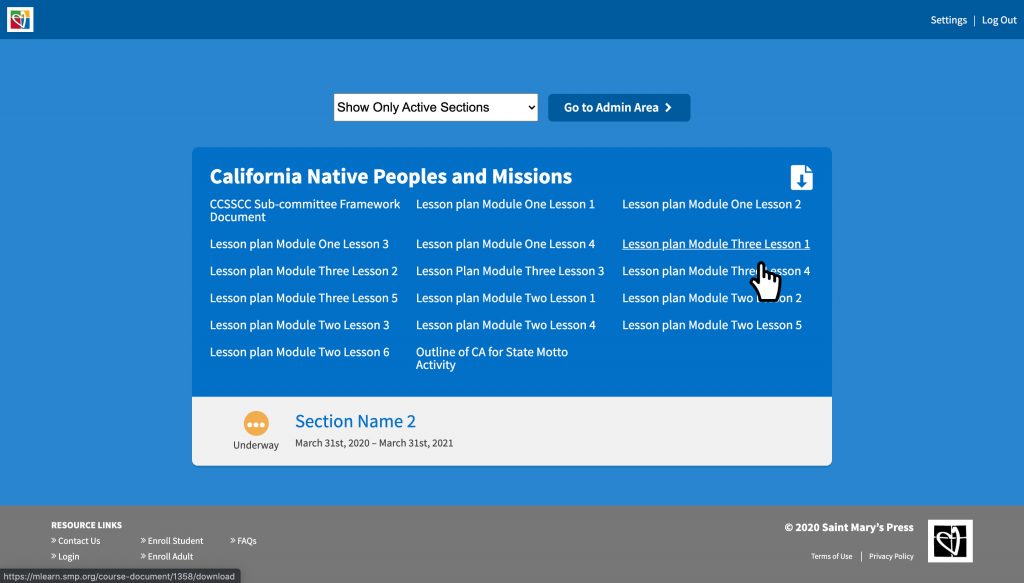
Step 5: To enter the admin side of the site, click on the “Go to Admin Area” button.
Admin Entry Page
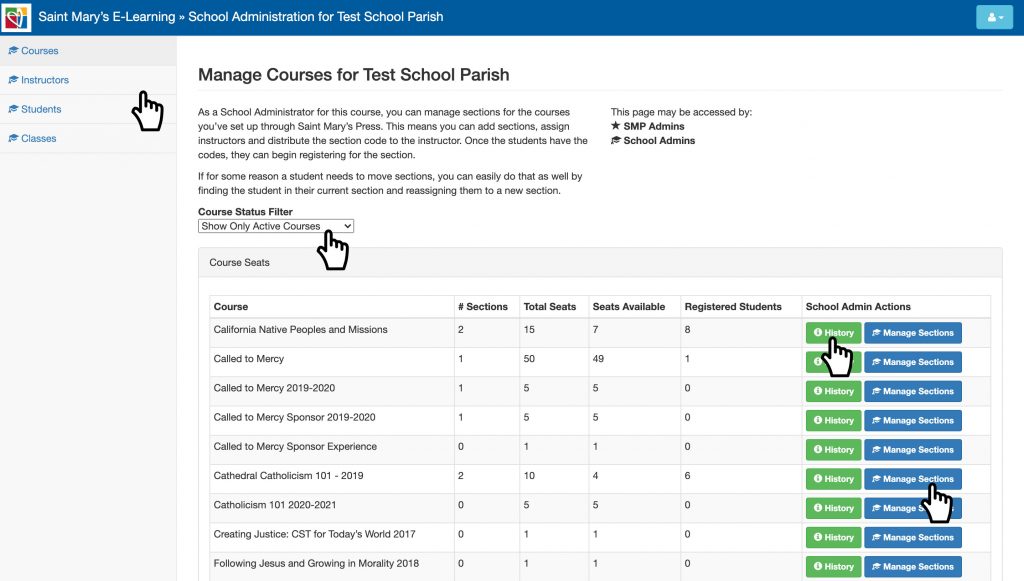
On the admin entry page, you will see:
- links to course sections
- course filter
- course history
- instructors
- students profiles
Step 1: Click on the “Course Status Filter” and view active, all, and concluded courses.
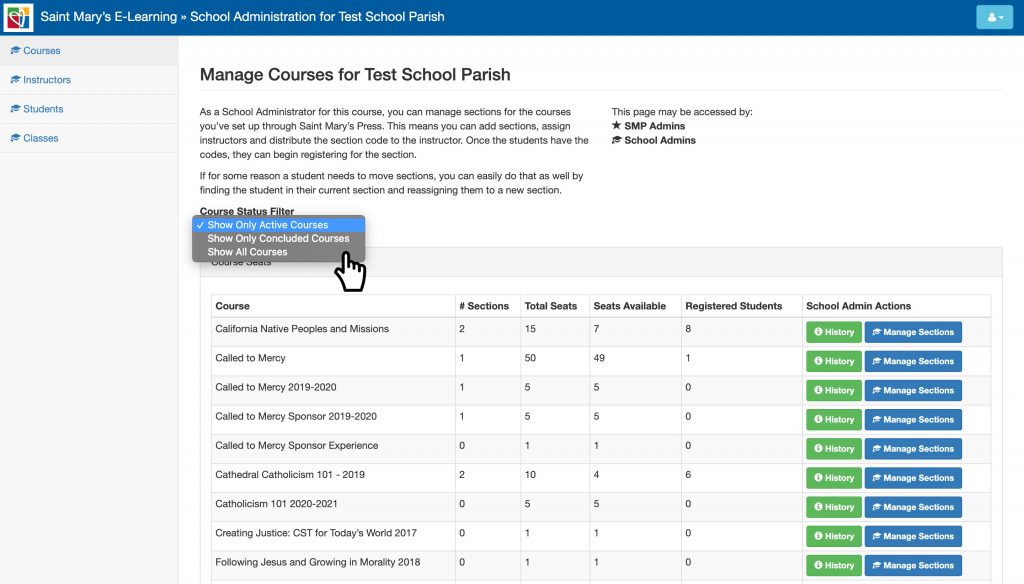
Step 2: Click on “Course History” and view all admin activity for the course.
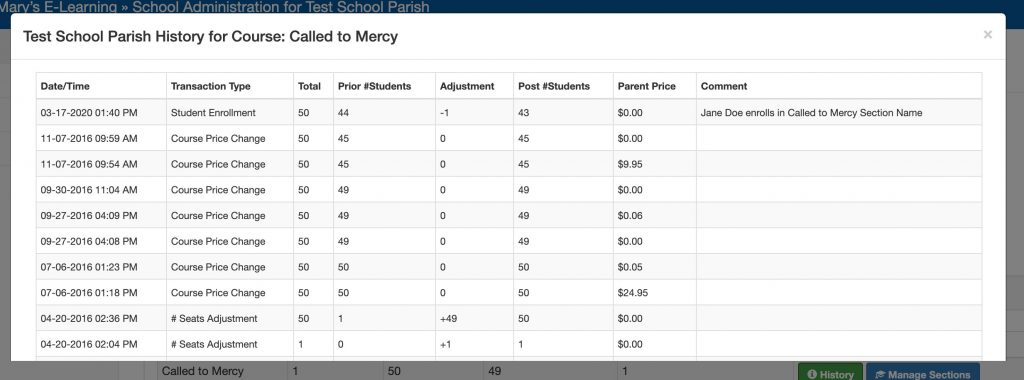
Step 3: Click on “Manage Sections” to add and/or edit a course sections.
Manage Section Page
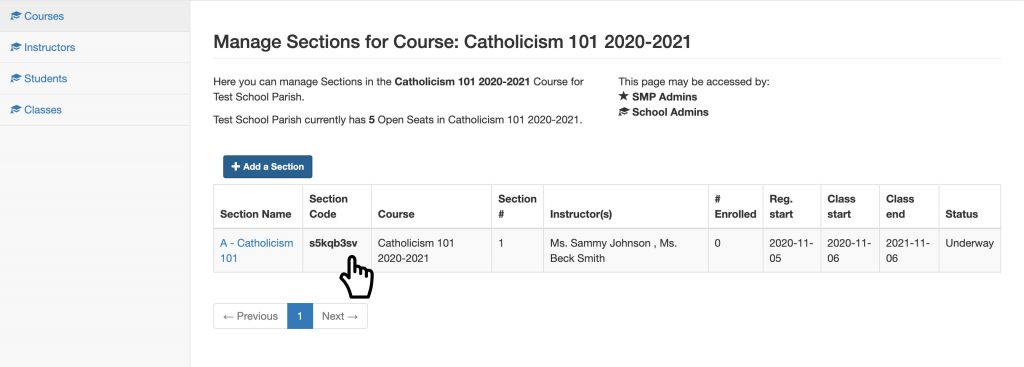
Step 1: You will enter the “Manage Sections” page, where you will see all sections created for this course. You will see:
- Section’s Name
- Section Code (for enrollment)
- Course name
- Section number
- Instructors teaching the section
- Students enrolled or registered
- Section dates and status
Step 2: To create a section, click on the “Add a Section” button. You will have to complete the following fields to complete:
- Enter section name.
- Select dates-enrollment, class start and end dates.
- Select an existing instructor(s) OR enter a new instructor (If you have to add an existing and new instructors, you will have to enter one, submit, and then go back in and edit the section, to add the other one. If you select existing instructor and enter a new one, only the new instructor will get an email confirmation.)
- Select whether you will be reviewing, enrolling or uploading students
- Click on “Submit”.
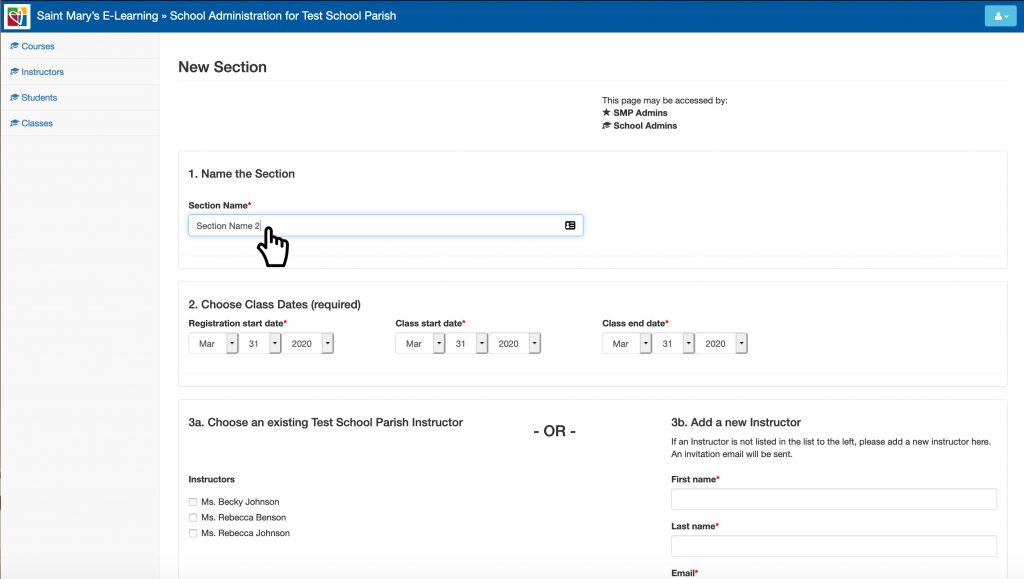
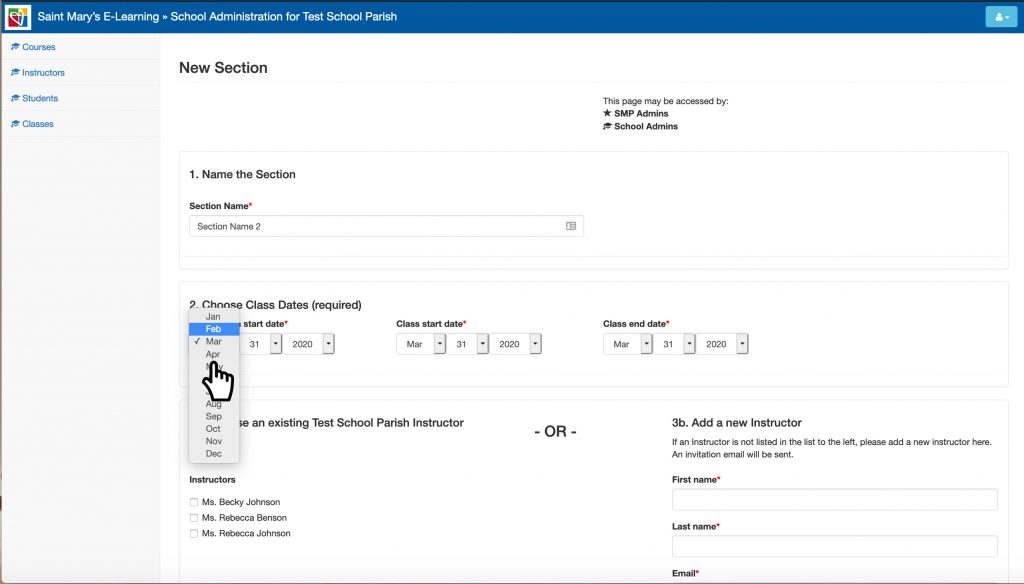


For more detailed directions on how to create a section, go to “How to Add a Section“.
Step 3: To edit a current sections, click on the sections name. Then select the “Edit Section” button.
Once you enter the section editing page, you can update the section name, change dates, add or remove instructors, and resend email confirmations if you change students will be uploaded or enrolling.
Section Page
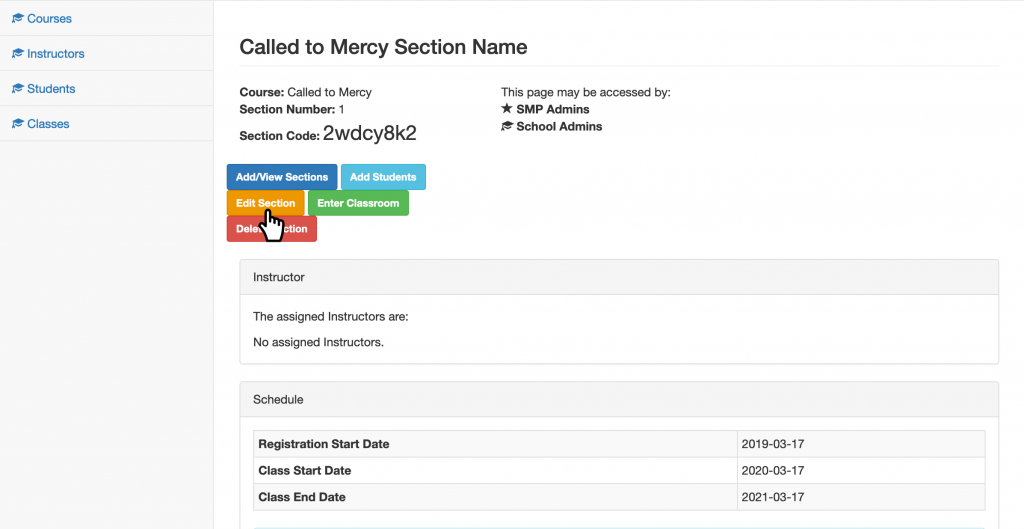
Step 1: If you select a section’s name on “Manage Section” you will be redirected to the section page. On this page you can view the section details:
- Section name
- Course
- Section number
- Section code
- Instructor(s) teaching the section
- Section dates
- Students enrolled
You can select the following links and buttons:
- “Add/View Sections” – to go back and view all sections under the course.
- “Add or Upload a student(s)” (This options is only available for username accounts. Please contact us if you want to have this option at 1-800-533-8095) – you can upload a CSV or add individual students. To learn more, go to “How to Add or Upload Students to a Section“.
- “Edit Section” – to edit the section’s details that you are viewing, add or remove instructor(s).
- “Enter Classroom” – to enter the course section and view the student’s or instructor’s side.
- “Delete Section” – to completely delete a section.
Step 2: You can transfer a student to another existing section that is under the same course. Scroll down to the student you wish to transfer, click on “Assign to Section” drop-down and select the section you wish the student to transfer to, followed by selecting “Update”.
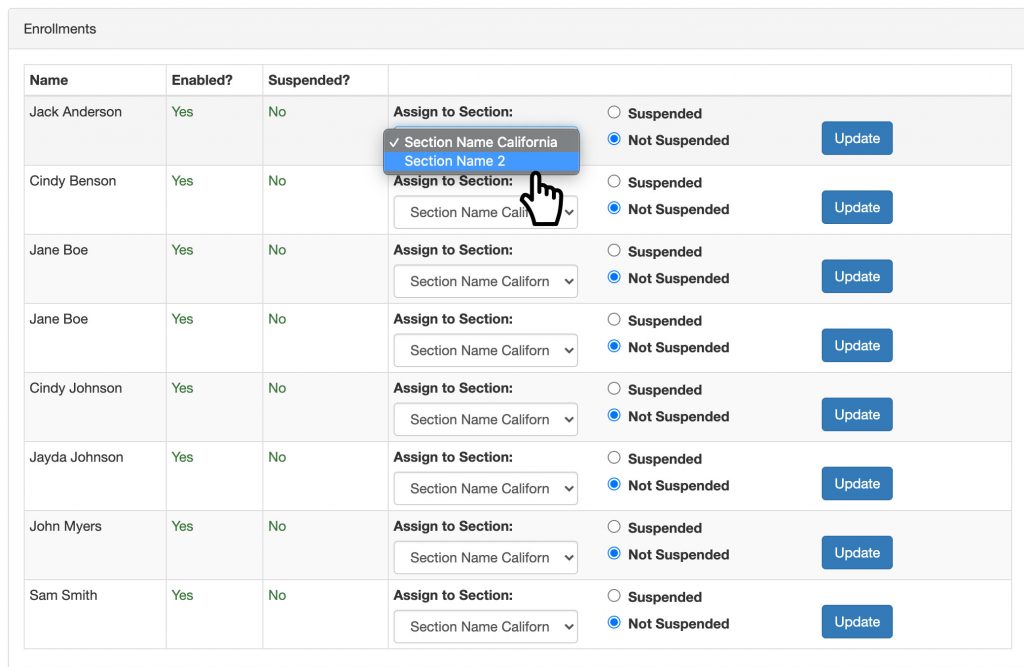
For more details, go to “How to Transfer Student between Sections“.
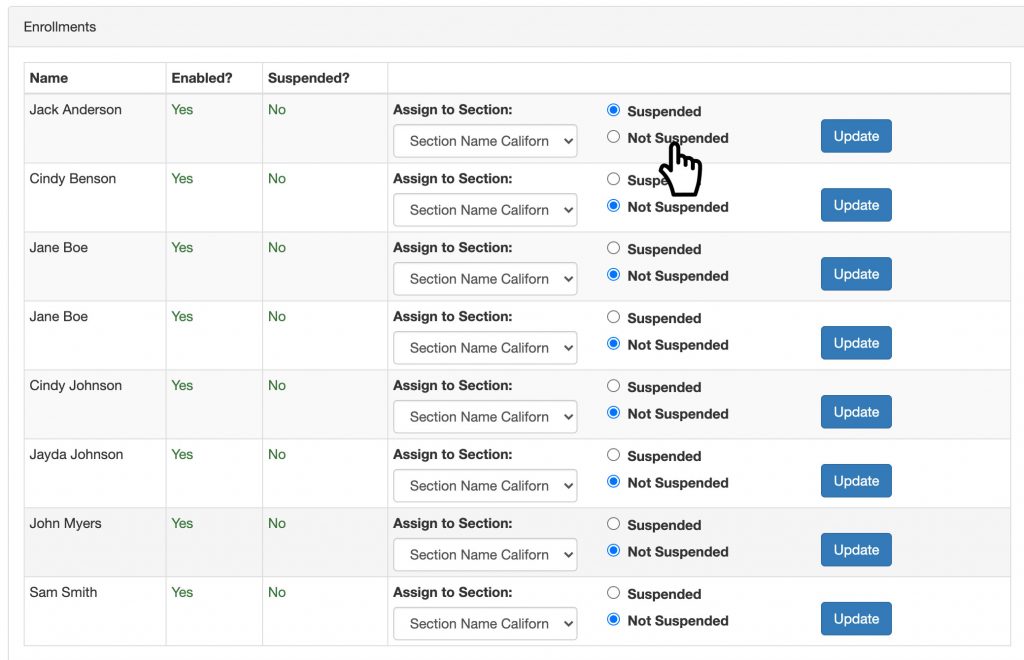
Step 3: You can also suspend a student by finding the student and clicking on “Suspend“, then “Update”. The student will not be able to view the course section when they log in.
Students Page
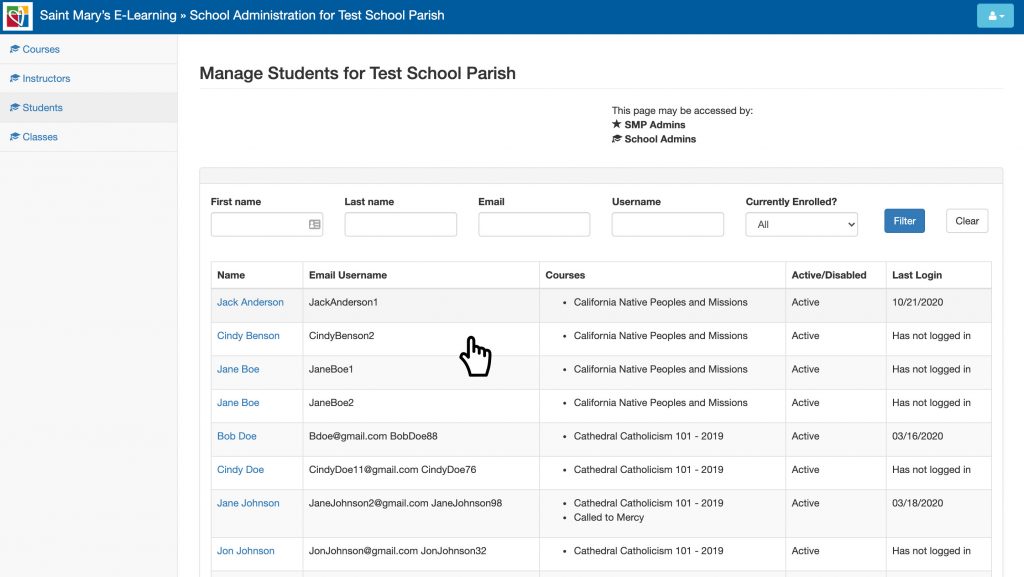
Step 1: To edit a student’s profile or to see all students registered in your school or parish, click on “Students” located at the top left hand side. You will enter the students page.
The following student’s details will show:
- students full name
- email address and/or username
- course the student is are enrolled in
- active or disabled status
- last time they logged in
You can search by:
- first or last name
- email address
- username
- currently enrolled status – actively in a section(s) or not and all.
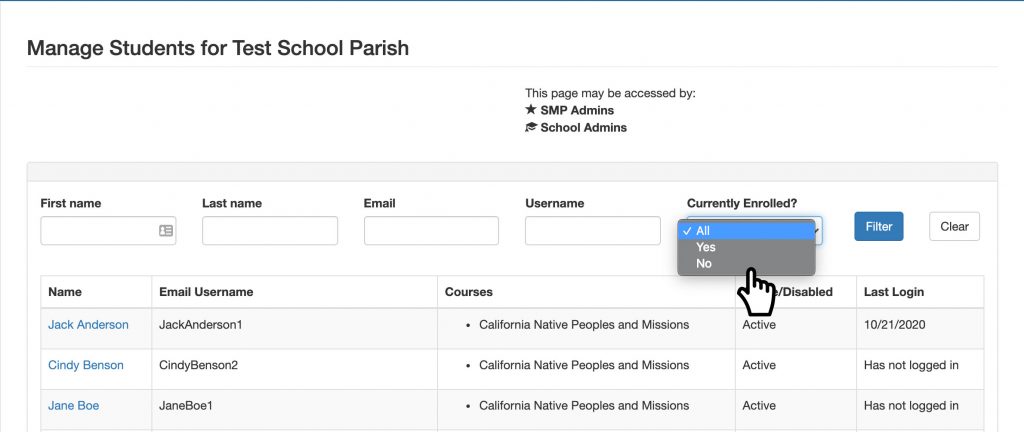
Step 2: To view a student’s full profile, click on the “Students Name”. You will be able to select “Edit Students” or “Reset Password“.
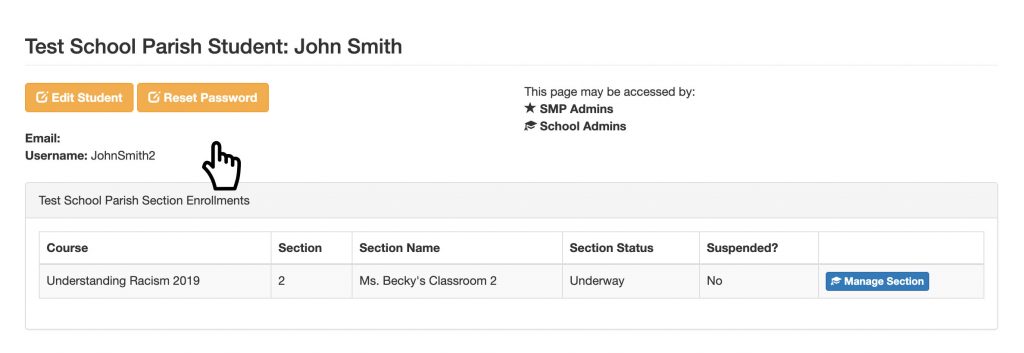
Step 3: Also, you will see all the course sections the student is enrolled in. You can click on “Manage Sections” and you will be redirected you to that section.
Instructors Page
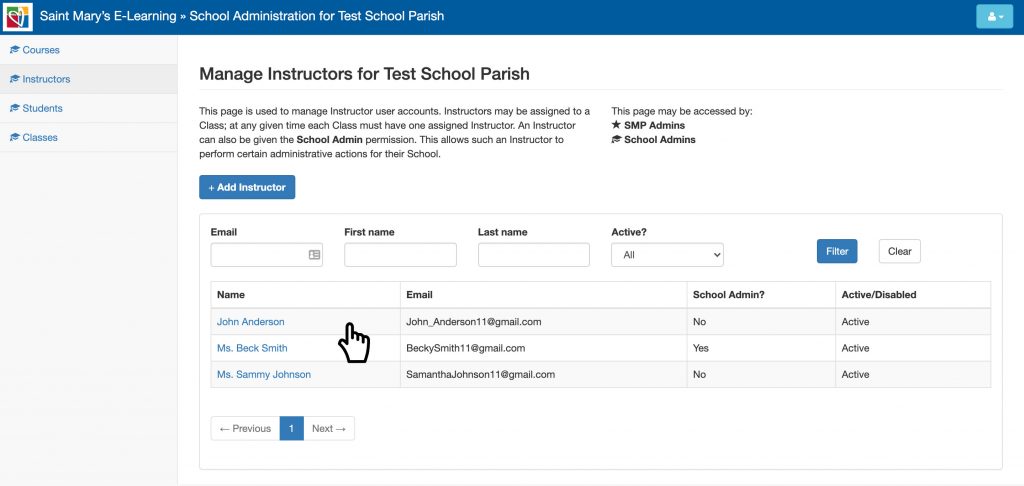
Step 1: To view all the instructors in your school or parish or edit their profiles, click on “Instructors” located in the top left hand side. You will enter the instructors page.
The following details will show:
- instructor(s) full name
- email addresses
- whether or not they are admins
- active or disabled status
You can search for instructors by:
- first or last name
- email address
- active or disabled status
Step 2: You can add an instructor by clicking on “Add Instructor” and completing the form. But they will not get any email confirmation. The new instructor can go to the login page and select “Forgot My Password” to finish setting up their account.
Step 3: To edit or view an instructors profile and all their sections they are teaching, select the instructor’s name, and you will be directed to the instructor’s profile page.

You will be able to view:
- instructor’s full name
- email address
- whether or not they are a admin (If it does not say “admin”, then they are not.)
- all the course sections they are teaching
Step 4: You can edit the instructors name, email address and make them admins by clicking on the “Edit Instructor” button.
Step 5: To reset their password, just click on “Reset Password” and enter the new password.
Step 6: Also, you can view any section they are teaching by clicking on the “Manage Section” button.
